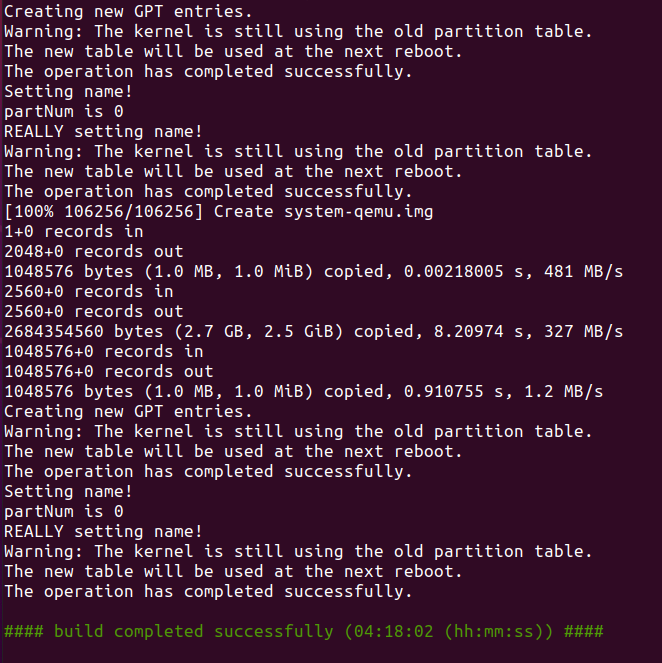
整编 整编,就是编译整个 Android 源码,最终 out 目录会生成几个重要的镜像文件,其中有 system.img、userdata.img、ramdisk.img 等,这些是可以刷机的。
准备编译环境 1.安装 openjdk
1
2
sudo apt-get update sudo apt-get install openjdk-8-jdk
2.安装以下依赖包:
1 sudo apt-get install git-core gnupg flex bison gperf build-essential zip curl zlib1g-dev gcc-multilib g++-multilib libc6-dev-i386 lib32ncurses5-dev x11proto-core-dev libx11-dev lib32z-dev ccache libgl1-mesa-dev libxml2-utils xsltproc unzip
初始化编译环境 进入项目目录,打开终端,输入命令:
1 source build/envsetup.sh
编译前删除build文件夹
选择编译目标 输入命令:
lunch命令是envsetup.sh里定义的一个命令,用来让用户选择编译目标。
输出:
1
2
3
4
5
6
7
8
9
10
11
12
13
14
15
16
17
18
19
20
21
22
23
24
25
26
27
28
29
30
31
32
33
34
35
36
37
38
39
40
41
42
43
44
45
46
47
48
49
50
51
52
53
54
55
56
57
58
59
60
61
62
You're building on Linux Lunch menu... pick a combo: 1. aosp_arm-eng 2. aosp_arm64-eng 3. aosp_blueline-userdebug 4. aosp_blueline_car-userdebug 5. aosp_bonito-userdebug 6. aosp_bonito_car-userdebug 7. aosp_bramble-userdebug 8. aosp_car_arm-userdebug 9. aosp_car_arm64-userdebug 10. aosp_car_x86-userdebug 11. aosp_car_x86_64-userdebug 12. aosp_cf_arm64_auto-userdebug 13. aosp_cf_arm64_phone-userdebug 14. aosp_cf_x86_64_pc-userdebug 15. aosp_cf_x86_64_phone-userdebug 16. aosp_cf_x86_auto-userdebug 17. aosp_cf_x86_phone-userdebug 18. aosp_cf_x86_tv-userdebug 19. aosp_coral-userdebug 20. aosp_coral_car-userdebug 21. aosp_crosshatch-userdebug 22. aosp_crosshatch_car-userdebug 23. aosp_flame-userdebug 24. aosp_flame_car-userdebug 25. aosp_redfin-userdebug 26. aosp_sargo-userdebug 27. aosp_sunfish-userdebug 28. aosp_trout_arm64-userdebug 29. aosp_trout_x86-userdebug 30. aosp_x86-eng 31. aosp_x86_64-eng 32. arm_krait-eng 33. arm_v7_v8-eng 34. armv8-eng 35. armv8_cortex_a55-eng 36. armv8_kryo385-eng 37. beagle_x15-userdebug 38. beagle_x15_auto-userdebug 39. car_x86_64-userdebug 40. db845c-userdebug 41. fuchsia_arm64-eng 42. fuchsia_x86_64-eng 43. hikey-userdebug 44. hikey64_only-userdebug 45. hikey960-userdebug 46. hikey960_tv-userdebug 47. hikey_tv-userdebug 48. pixel3_mainline-userdebug 49. poplar-eng 50. poplar-user 51. poplar-userdebug 52. qemu_trusty_arm64-userdebug 53. silvermont-eng 54. uml-userdebug 55. yukawa-userdebug 56. yukawa_sei510-userdebug Which would you like? [aosp_arm-eng]
lunch 命令选择要构建的目标 设备类型。目标是指设备组合,例如特定型号或设备类型。
其中BUILD表示编译出的镜像可以运行在什么环境,aosp代表Android开源项目,arm表示系统是运行在arm架构的处理器上。
BUILDTYPE 则指的是编译类型,通常有三种:
user:用来正式发布到市场的版本,权限受限,如没有 root 权限,不能 dedug 等。
userdebug:在user版本的基础上开放了 root 权限和 debug 权限。
eng:代表 engineer,开发工程师的版本,拥有最大的权限(root等),具有额外调试工具的开发配置。
如果没有谷歌手机设备,可以选择 arm 或者 x86,我选择了 aosp_x86_64-eng ,编译完后运行模拟器看看,因此这里选择序号 31 。
开始编译 通过 make 指令进行代码编译:
1 make -j6 #建议不要大于等于电脑核数,否则出现内存不足,编译失败(切身体会)
其中 -j N 参数表示处理并行任务,通常使用的任务数 N 介于编译时所用计算机上硬件线程数的 1-2 倍之间。
查看计算机上的核心数:
1
2
3
4
5
6
7
8
9
brooks@MiPro:~/work/aosp$ cat /proc/cpuinfo | grep processor processor : 0 processor : 1 processor : 2 processor : 3 processor : 4 processor : 5 processor : 6 processor : 7
开始编译输出:
1
2
3
4
5
6
7
8
9
10
11
12
13
14
15
16
17
18
19
20
21
22
23
24
25
26
27
28
29
30
31
32
33
34
35
36
37
brooks@brooks-Mi-Pro:~/aosp$ make -j6 09:47:02 ************************************************************ 09:47:02 You are building on a machine with 15.5GB of RAM 09:47:02 09:47:02 The minimum required amount of free memory is around 16GB, 09:47:02 and even with that, some configurations may not work. 09:47:02 09:47:02 If you run into segfaults or other errors, try reducing your 09:47:02 -j value. 09:47:02 ************************************************************ build/make/core/soong_config.mk:195: warning: BOARD_PLAT_PUBLIC_SEPOLICY_DIR has been deprecated. Us e SYSTEM_EXT_PUBLIC_SEPOLICY_DIRS instead. build/make/core/soong_config.mk:196: warning: BOARD_PLAT_PRIVATE_SEPOLICY_DIR has been deprecated. U se SYSTEM_EXT_PRIVATE_SEPOLICY_DIRS instead. ============================================ PLATFORM_VERSION_CODENAME=T PLATFORM_VERSION=T TARGET_PRODUCT=aosp_x86_64 TARGET_BUILD_VARIANT=eng TARGET_BUILD_TYPE=release TARGET_ARCH=x86_64 TARGET_ARCH_VARIANT=x86_64 TARGET_2ND_ARCH=x86 TARGET_2ND_ARCH_VARIANT=x86_64 HOST_ARCH=x86_64 HOST_2ND_ARCH=x86 HOST_OS=linux HOST_OS_EXTRA=Linux-5.8.0-59-generic-x86_64-Ubuntu-20.04.2-LTS HOST_CROSS_OS=windows HOST_CROSS_ARCH=x86 HOST_CROSS_2ND_ARCH=x86_64 HOST_BUILD_TYPE=release BUILD_ID=AOSP.MASTER OUT_DIR=out PRODUCT_SOONG_NAMESPACES=device/generic/goldfish device/generic/goldfish-opengl hardware/google/camera hardware/google/camera/devices/EmulatedCamera ============================================
编译错误参考 :https://www.jianshu.com/p/8ec0f1f1863a
编译成功-大概花费时长:5h 第一次编译比较慢,大概5小时左右,编译n次才通过
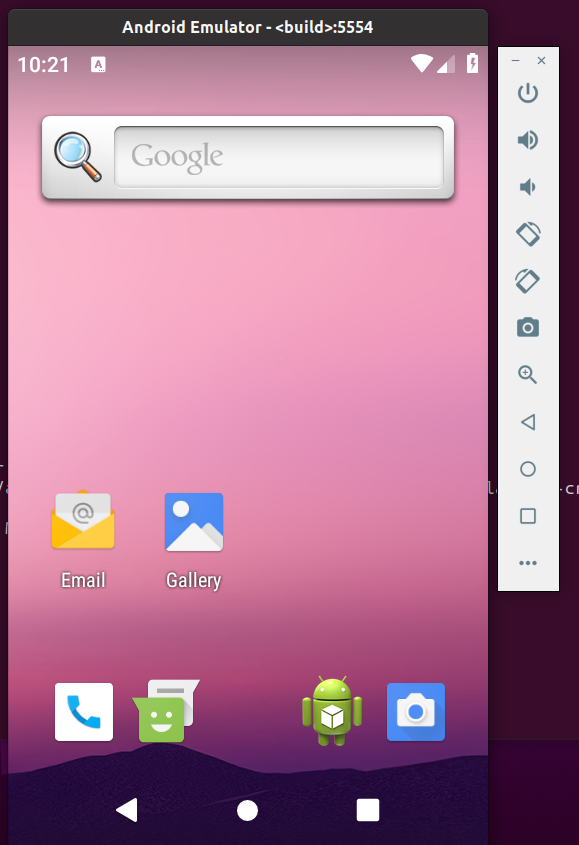
运行模拟器 在编译完成之后,就可以通过以下命令运行Android虚拟机了,命令如下:
1
2
3
source build/envsetup.sh lunch 31 emulator #如果编译后运行,直接使用此命令
1
2
3
4
5
6
7
8
9
10
emulator: WARNING: Couldn't find crash service executable /home/brooks/aosp-resource/aosp/prebuilts/android-emulator/linux-x86_64/emulator64-crash-service emulator: WARNING: system partition size adjusted to match image file (2562 MB > 800 MB) Your emulator is out of date, please update by launching Android Studio: - Start Android Studio - Select menu "Tools > Android > SDK Manager" - Click "SDK Tools" tab - Check "Android Emulator" checkbox - Click "OK" emulator: INFO: boot completed
注: 模拟器一直运行失败,各种错误解决不了。建议从官网下载aosp,然后重新编译。
模拟器运行需要四个文件,分别是:
Linux Kernel
system.img
userdata.img
ramdisk.img
上面我 lunch 命令时选择的是 aosp_x86_64-eng,因此 linux 默认使用的 AOSP/prebuilds/qemu-kernel/x86_64/kernel-qemu 下的 kernel-qemu,而其他文件则是使用的 AOSP/out/target/product/generic_x86 目录下的 system.img、userdata.img、ramdisk.img
感谢:
http://wuxiaolong.me/2018/07/25/AOSP2/ https://source.android.com/setup/build/building http://liuwangshu.cn/framework/aosp/3-compiling-aosp.html

